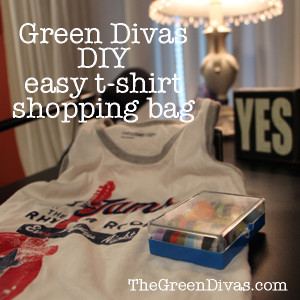
Reducing plastic is easy with your own reusable produce bag!
Listen to the Green Divas DIY podcast to learn how to make your own, then read on for more details. Be sure to check out the DIY tutorial at the end of the post!
Many of us are getting really good at remembering our large grocery bags to the store but I rarely see people with reusable bags in the produce section.
Every step we can take to reduce our plastic consumption is an important move in protecting our oceans and lakes from plastic pollution.
This DIY lets you take old t-shirts and make a them into produce bags, it is a super simple craft using items you have in your house.
What you need:
- Sewing kit (or a sewing machine if you have one)
- Kids or adult sized tank top t-shirt
- Thread
Are you not sure you can do this because you don’t have a sewing machine?
Don’t worry, you can learn how to sew for this easy craft. And if your sewing isn’t perfect it won’t matter—it will be good enough.
If you have never sewn before and don’t have any equipment, just get a sewing kit the next time you stay at a hotel. It will provide you with everything you need including enough thread.
Step One: Thread your needle.
Measure your thread to be no longer than double your arm length—it can be much shorter if that’s all you have, but anything longer is a pain to work with. Once you’ve cut your thread, take one end and thread it through the needle hole and pull the thread halfway through. Once both ends are even, tie a good knot as close to the bottom as you can. Sometimes I double knot at the end so that the knot is strong.
Step Two: Take your t-shirt and turn it inside out.
You’ll be seeing the bottom of the shirt closed at the bottom so if you want your can pin the bottom closed but it’s really not necessary.
Step Three: Start sewing at one end of the bottom of the t-shirt.
Pick one side to start on and work your way to the other side. On your first stitch, make a strong anchor so the bag doesn’t eventually start to open after you use it alot. Here’s how: run the needle through till it stops (from the knot) and place the needle through the bottom of the shirt close to where the needle is in the direction you’re heading towards. Do not pull it all the way through. Instead, leave a loose loop, take your needle and run it through the loop and then pull tight. Repeat this one more times on your next stitch.
Step Four: Keep sewing along the bottom.
Once you’ve made your two anchor stitches you don’t need to keep threading the needle through your thread loop. You can just make tight loops for the remaining length of the shirt—be sure to pull each one tight to ensure a strong bottom (especially if this bag is going to hold potatoes).
Step Five: Knot the end of the sewing line.
Using the same technique at the beginning loops for the last two loops at the end. Cut the thread at the end.
Step Six: Turn the shirt right side in.
Once you turn it right side in you’ll see that the shoulder straps of the shirt are now the handles.
Now you’re ready to go to the grocery store or farmers market and say no to all the plastic bags. The bonus” you get to tell people you sew now, because what you just did is really sewing! You can get creative with what shirts you use and if you don’t have many tank tops look for them at yard or tag sales or even at the end of the season when they go on deep discount. I find that children’s size tank tops are the best size bags.
Watch the DIY video:
Listen to the entire Green Divas Radio Show!
Besides my DIY, you’ll get to hear Environmental Rock Star Michael Green of the Center for Environmental Health talk about the reality of “bpa-free” plastic and more.
